Deploying ElmapiCMS on Laravel Forge
Laravel Forge provisions and manages servers for Laravel applications. You connect a server provider (or use Laravel VPS), create a site from your Git repository, and deploy ElmapiCMS with minimal server setup.
In this guide, you'll learn how to deploy ElmapiCMS to Laravel Forge—from connecting GitHub to seeding the database and configuring queue workers for webhooks.
For more information, see the Laravel Forge documentation.
1. Prerequisites
Before you begin, ensure you have:
- A Laravel Forge account (Laravel Forge)
- A Git repository Forge can deploy from (see below)
- A server provider account if you are not using Laravel VPS (for example DigitalOcean, Hetzner, AWS, Vultr, or Akamai / Linode). Laravel VPS needs no extra provider setup after you subscribe to Forge. To link an external provider, open your organization settings → Server providers → Add provider. See Server providers.
2. Prepare a Git repository
See Deployment overview for the fork rule. You must not point Forge at the vendor private repository you were invited to.
Shop / GitHub access: fork the private repository into your account. In Forge, select your fork and the branch you deploy from (often main). Keep the fork up to date when new versions ship.
CodeCanyon: extract elmapicms.zip, then create a repository you control and push the app to it. Steps are in For CodeCanyon buyers.
3. Give Forge access to your GitHub account
Source control providers are managed in your organization settings, not on each server.
- Open your organization settings in Forge.
- Go to the Source control page.
- Click Add provider.
- Select GitHub (or GitLab / Bitbucket) and authenticate the account that owns your ElmapiCMS repository.
You may only connect one account per provider at a time. When you connect via OAuth, Forge can list repositories that account can access. For tighter security, you can use a deploy key for a single repository instead of full account access.
See Source control in the Forge docs.
4. Create a new server
- Log in to your Laravel Forge account.
- Open your organization's overview or the Servers tab and click New server.
- Choose a name for your server.
- Choose a server provider (for example Laravel VPS, DigitalOcean, Hetzner, AWS, or another supported provider).
- Click Continue.
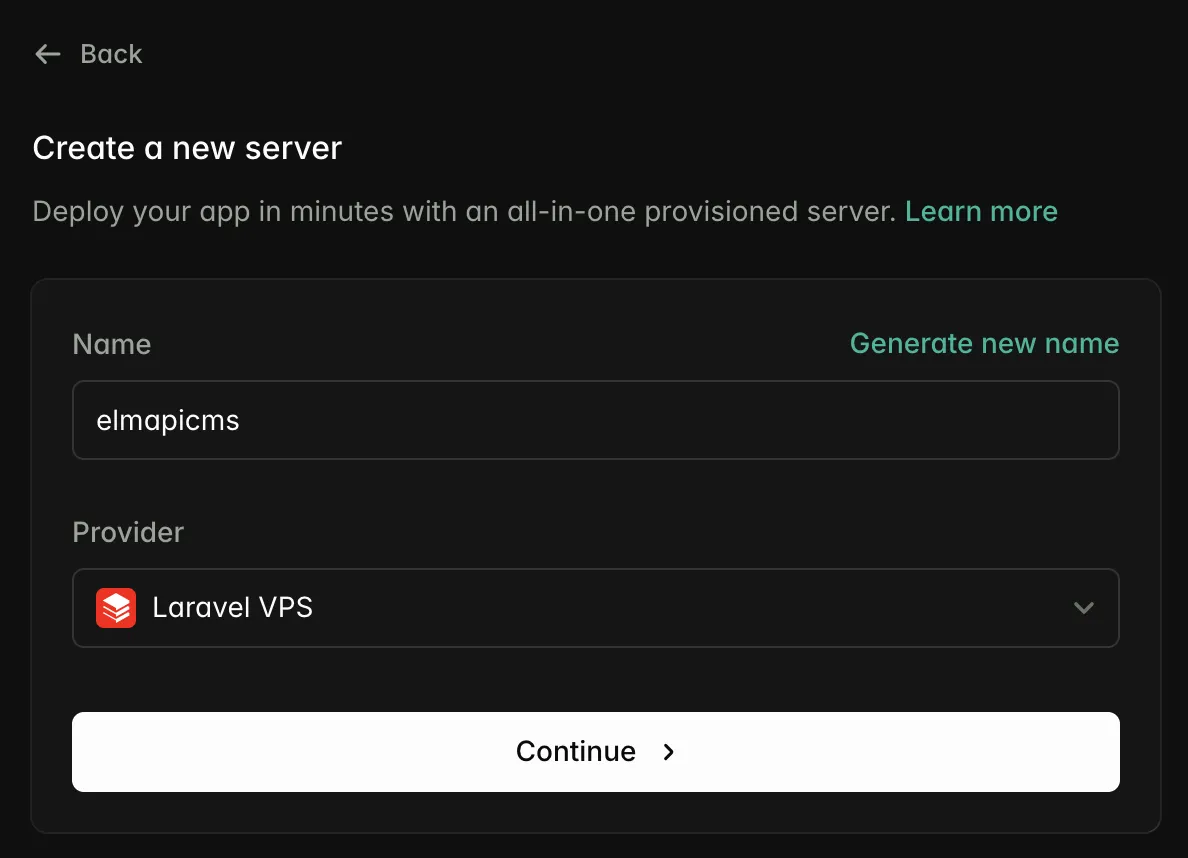
5. Configure the server
- Set the server type to App Server. App servers include Nginx, PHP, a database (if selected), Redis, Node.js, and Supervisor—everything a typical Laravel app needs on one machine.
- Choose a region and server size.
- Click Create server.
- Wait while Forge provisions the server. This can take several minutes.
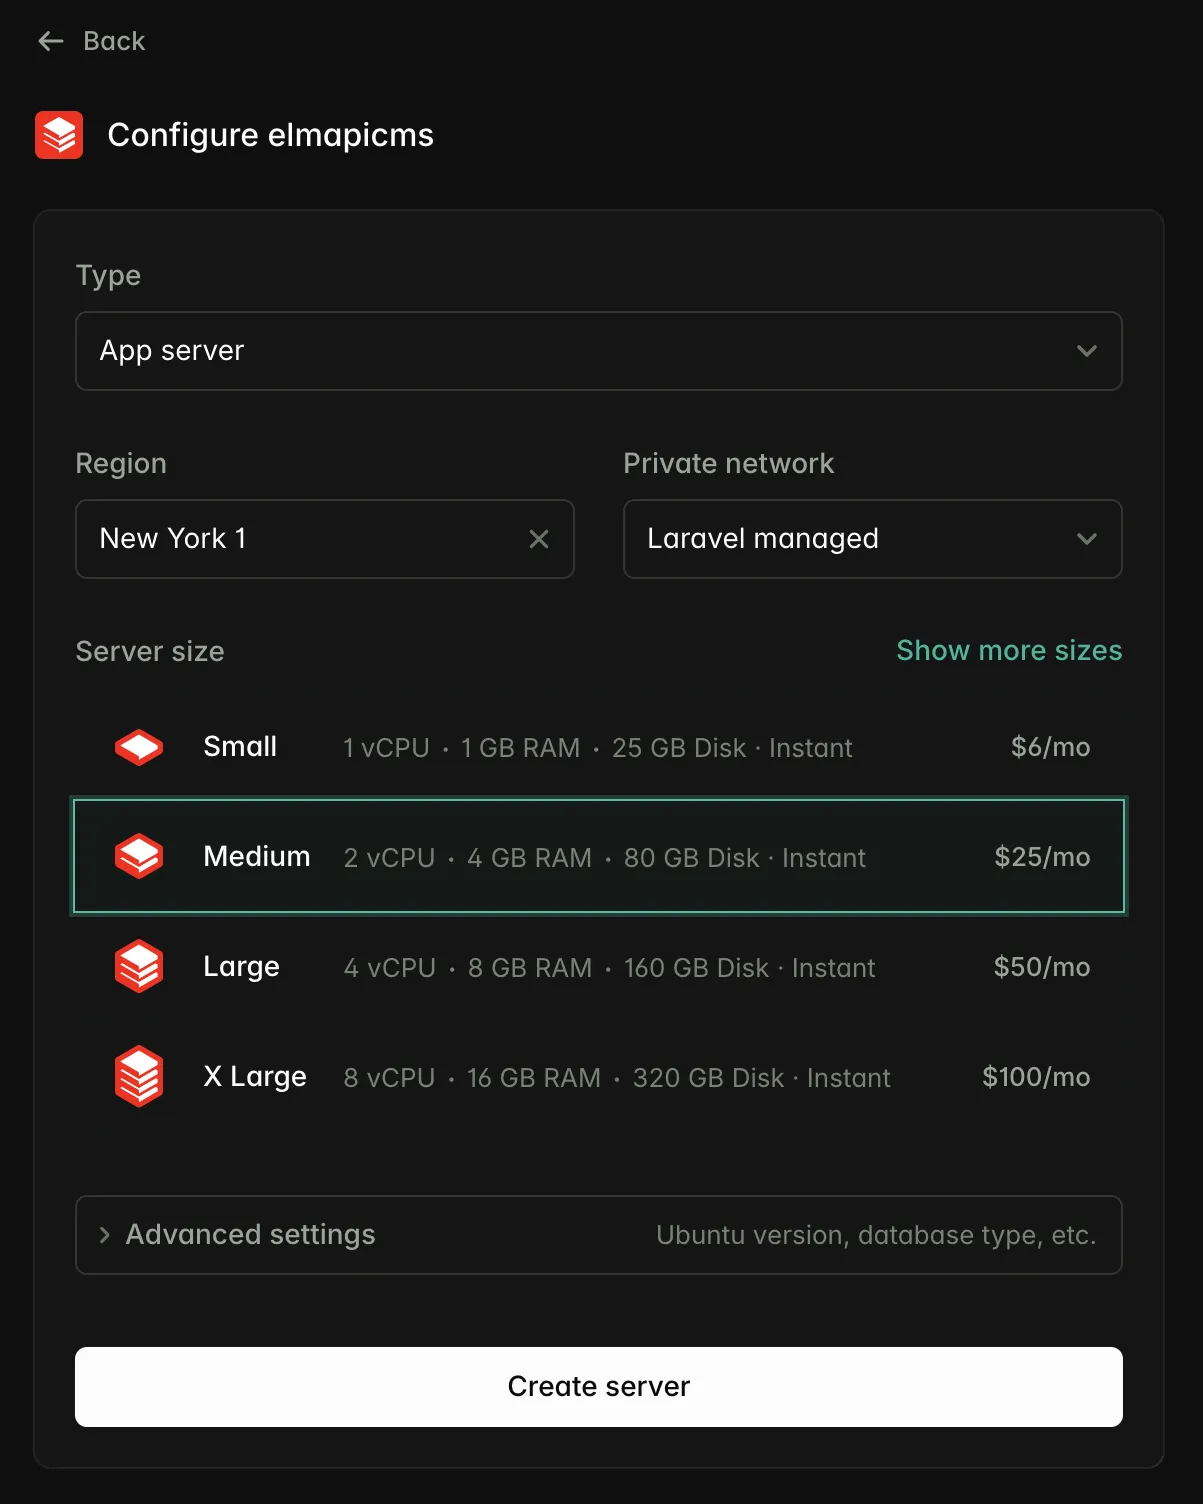
If you are unsure which server type to use, choose App Server. See Server types.
6. Create a new site
- Open the server detail page.
- Click to create a new site.
- Choose a Laravel application / site type.
- Select your ElmapiCMS Git repository and the branch to deploy.
- Use the default database on the server, or create a new database for this site.
- Enable Install Composer dependencies so Forge runs
composer installafter the site is created and includes it in future deploys. - Create / install the site and wait for Forge to finish.
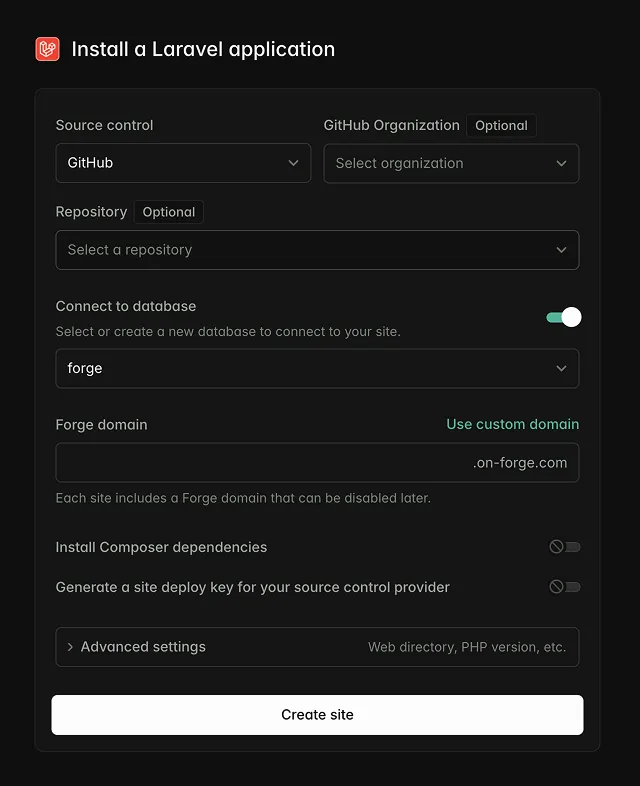
Every Forge site gets a free on-forge.com domain with HTTPS. You can set a custom subdomain during creation or add your own domain later. See Creating sites.
Ensure the site PHP version meets ElmapiCMS server requirements (PHP ≥ 8.4). You can change the PHP version from the site Settings tab if needed.
7. Visit your application and point a custom domain
Forge assigns an on-forge.com URL for the site. Open that URL to confirm the application responds.
To use your own domain:
- Add the domain in the Forge site settings.
- Point your DNS A (or AAAA) record at the server’s public IP (or follow Forge’s domain instructions for your setup).
- Request an SSL certificate from the site SSL tab when DNS is ready.
8. Seed the database
Forge’s deploy script often runs migrations. For a first install you still need to seed the default admin user.
- Open the site detail page.
- Go to the Commands panel.
- Run:
php artisan db:seed --force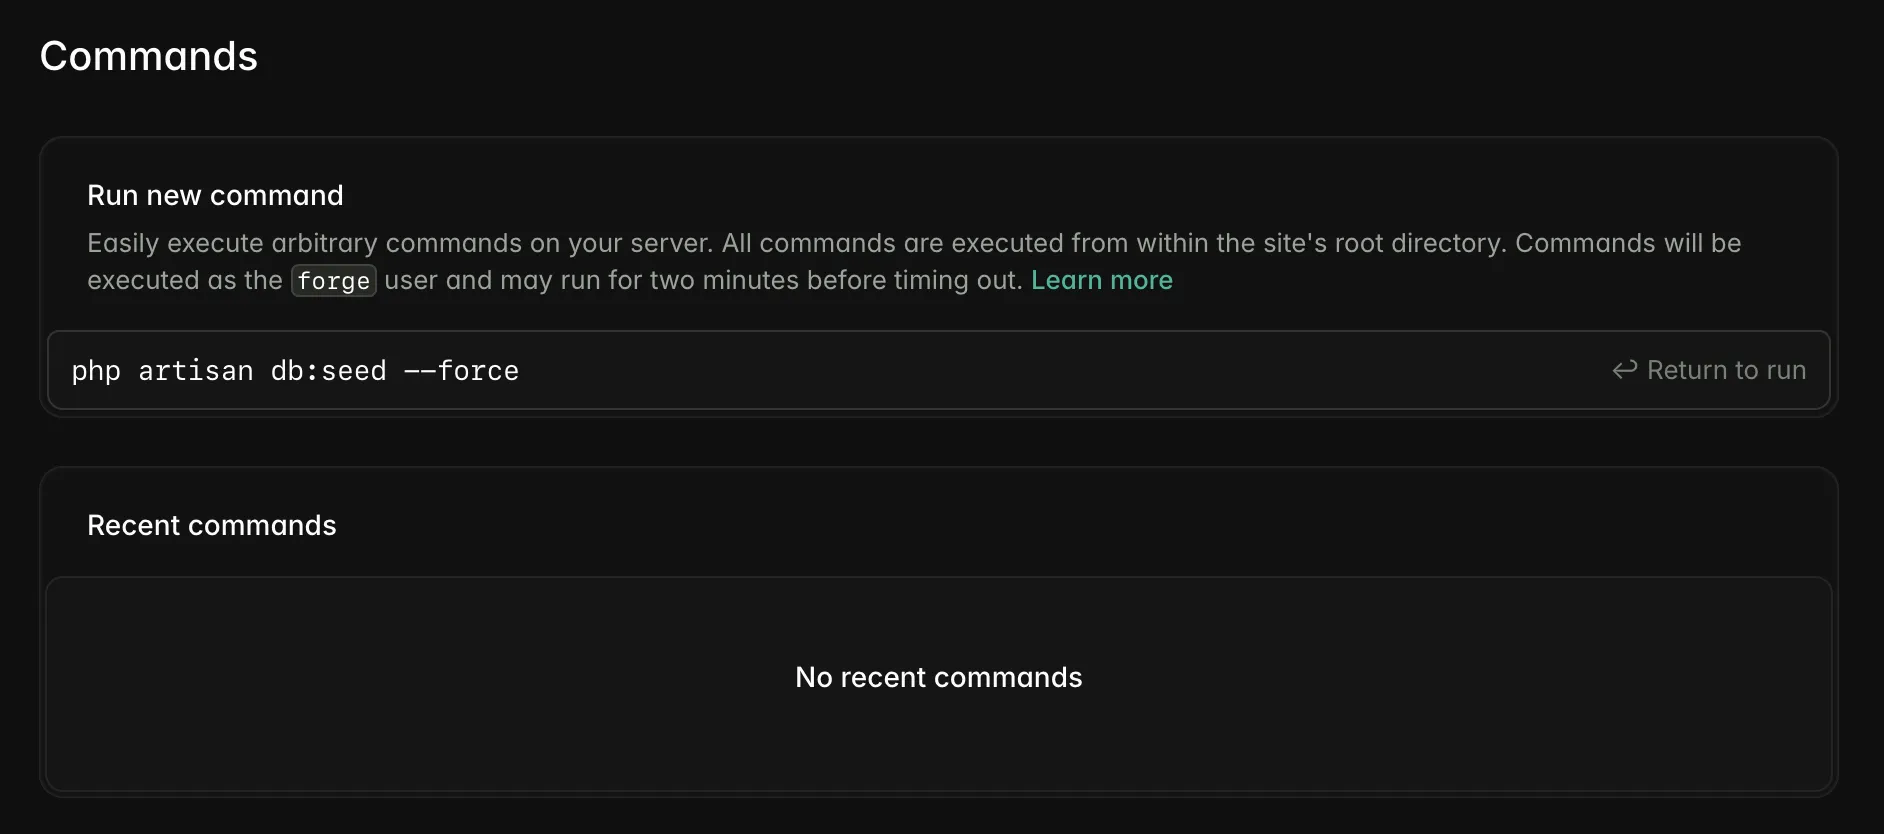
If the database has no tables yet, run php artisan migrate --seed --force instead. Commands run from the site root and must finish within five minutes. See Commands.
9. Login
When seeding the database, an admin account is created. You can log in using:
Email:
[email protected]Password:
passwordRemember to change your email and password after login.
10. Webhook setup
ElmapiCMS sends webhooks through a queue. On Forge, create a queue worker so jobs run in the background.
-
Open your site in Forge.
-
Open the Processes tab (or use New Worker / Add background process, depending on your Forge UI).
-
Create a Queue worker with settings similar to:
- Queue Connection:
database(orredisif you use Redis) - Queue:
webhooks - Number of Processes:
1
- Queue Connection:
-
Create the background process. Forge runs it under Supervisor and restarts it if it crashes.
After deploys, Forge should restart workers when your deploy script includes $FORGE_PHP artisan queue:restart (or $RESTART_QUEUES() with zero-downtime deployments). Confirm that line exists in your deploy script.
For more detail on queue drivers, see Configuring Queues for Webhooks and Queues on Forge.